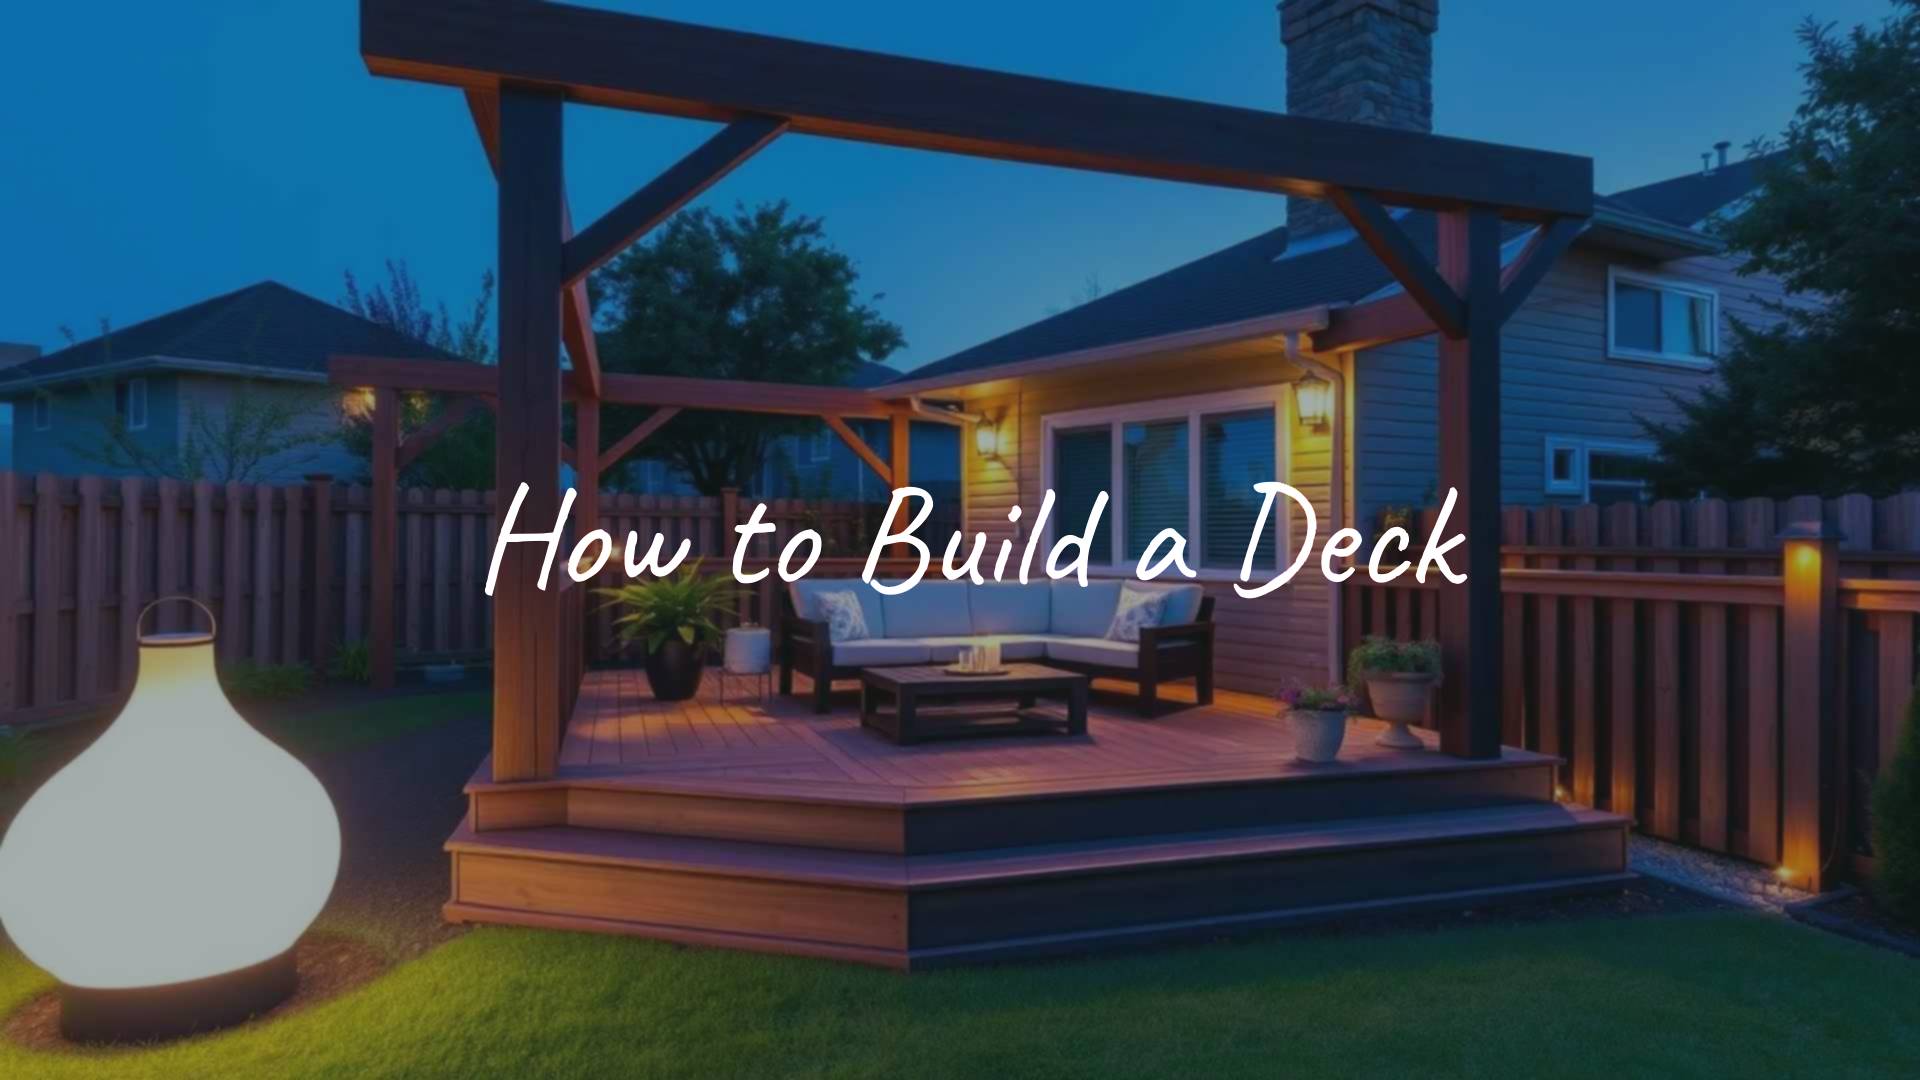
Building a deck is a great way to add usable space to your home, giving you a spot to hang out, host guests, or simply enjoy the outdoors. A deck can turn an empty part of your yard into a welcoming and practical area. While building a deck might seem overwhelming, especially if you haven’t done large DIY projects, it can be accomplished with careful planning, the right tools, and some determination. This guide will take you through the important steps and things to think about, helping you turn your ideas into a finished project.
We’ll talk about checking your local rules, finding the best materials, understanding the building process, and more. Remember that some jobs, like digging holes for footings, can be tough work, but finishing a deck on your own is very satisfying. Let’s get started and work step-by-step to build the perfect space for your outdoor life!

Things to Do Before You Start Building
Before you begin any hands-on work, a good deck starts with some homework. It’s not just about lifting heavy things-it’s also about following the right steps and being aware of what’s required. Ignoring these early tasks can cause delays, more work, or legal trouble later on.
This part is about making sure what you want to build works for your space and fits local rules, starting you off on the right foot for everything else that comes next.
Permits and Building Codes
One of the most important first steps is finding out which permits you need and which building codes apply to your area. These rules are there for safety and quality. Cities and counties often have different regulations on deck building. Sometimes, small ground-level decks don’t need permits, but you should always contact your local building or planning office first. They can tell you about permit requirements, required inspections, and rules for things like footing depth, railing height, and fasteners. If you skip permits or break code, you might face fines or have to tear down your deck. It’s also required to call 811 before digging so utility companies can mark where water, gas, and power lines are underground. This helps avoid dangerous and costly accidents.

Should You Build the Deck Yourself?
One big decision is whether to build the deck on your own or hire someone. Here’s a breakdown:
| DIY Pros | DIY Cons |
|---|---|
| Save money on labor Pride in building it yourself Choose your materials and design Control timing |
May take a long time Requires carpentry knowledge Physically hard work You have to fix mistakes yourself |
Building your own deck can save money and let you customize it, but it’s a big job that takes time, planning, and know-how. If you’re unsure about any step or want more complex features, getting professional help can prevent problems and give you peace of mind.
Planning Your Deck
Good planning makes deck building much easier, cheaper, and less stressful. Sketching your ideas, measuring, and making lists now will help avoid headaches and extra costs later. It’s about turning your dream into step-by-step instructions before you get started.
Choosing Deck Size and Shape
Your deck’s size and shape affect how it looks and how useful it will be. Think about how much space you have and what you want to use the deck for. Will it be a small corner for relaxing, a big party space, or somewhere just for grilling? For first-timers, ground-level decks (12-30 inches above ground) are easier to build since they don’t need many stairs or railings.
Draw a sketch showing where you want posts or footings. If there are trees or other things in your yard, plan around them. For example, building around a tree can give shade, but you’ll need to make sure the deck won’t hurt the tree’s roots as it grows. If you want detailed shapes or more than one level, plan for more work and extra materials. Take lots of measurements to see where property lines or obstacles might limit your ideas.
Deck Location and Layout Considerations
Where you put your deck matters for comfort and how well it lasts. Sun, shade, and wind play a big role. Trees and bushes can give shade and privacy. If you want a sunny spot, put the deck where it isn’t blocked. You might want to add a patio umbrella, pergola, or lattice screen for comfort and privacy.
Pay attention to water drainage and the ground level. A flat, easy-to-reach area is best, but you might need to dig or build a small wall for a sloped yard. Also, think about how close your deck will be to house doors for easy access and good use of space.
Picking Decking Materials
The type of decking you use affects how the deck looks, how long it lasts, how much care it needs, and of course, the cost. Some common options are:
- Pressure-treated wood: Inexpensive and easy to stain any color. Needs maintenance (sealing, staining) to avoid damage.
- Composite or PVC decking: Resistant to rot and bugs, very low maintenance, but often costs more. Looks tidy with hidden fasteners.
- Cedar or redwood: Naturally resists rot and pests, has a nice look but can be pricey.
Pick your material based on your budget, the look you want, how much time you want to spend maintaining it, and your local weather.

Making a Deck Plan
Once you know the deck’s shape, size, and materials, draw up a plan. Use accurate measurements to calculate how much lumber, concrete, and hardware you need. Get advice at your home improvement store if you’re unsure. Your plan should also list how you’ll handle things like uneven ground, trees, or other special situations. A good plan reduces mistakes and saves time and money.
What Tools and Materials Will You Need?
You’ll need more than just enthusiasm to build a deck-you need the right tools and materials. Having all this ready at the start will help the project go much smoother and remove delays.
Essential Tools
- Measuring tape, chalk line, and a long level for marking and leveling
- Square or T-square for marking corners
- Circular saw and miter saw for cutting boards
- Shovel and post-hole digger (or power auger) for preparing footings
- Power drill, hammer, and possibly a nail gun
- Sawhorses, tamper, and mortar hoe for cutting and mixing materials
- GFCI-protected power cords for outdoor power tool safety
Deck Materials
- Pressure-treated lumber or concrete blocks for posts and framing (choose lumber marked for “ground contact” for areas touching the ground)
- Decking boards (pressure-treated, composite, or other)
- Concrete mix for footings
- Exterior nails or screws, deck hardware (joist hangers, post bases, structural screws/bolts), self-adhesive flashing tape for protection, and optional gravel for drainage

Safety Gear
- Safety glasses/goggles for cutting and drilling
- Ear protection for power tools
- Dust mask for sawing or mixing cement
- Gloves for handling rough materials (always remove before using saws!)
Follow all manufacturer safety rules. Keep your work area tidy to avoid tripping.
Deck Building Steps
Once you’ve got all the permits, plans, tools, and materials, it’s time to start building. Here are the main steps, in order:
1. Prepare the Area
- Clear the building area-remove grass, rocks, weeds, or old decks.
- Level out the ground if you can. If needed, dig out high spots or build up low spots.
- Mark the shape of your deck on the ground using batter boards (temporary frames) and string. Make sure your outline is square using the 3-4-5 rule: measure 3 feet one way, 4 feet the other, and the diagonal between should be 5 feet for a right angle.
- Mark where footings/piers go with spray paint, and consider laying gravel in this area to help water drain later.
2. Build the Foundation (Footings and Piers)
- Use a posthole digger or auger to dig footing holes below the frost line if needed.
- Put concrete form tubes in the holes and keep them level.
- Center them according to your plan, then fill in the holes tightly around the tubes with soil and tamp it down.
- Pour in mixed concrete and insert anchor bolts in the center before it dries. Wait for the concrete to harden fully before moving on.
3. Install Posts and Supports
- Attach post bases to the anchor bolts in the footings. Leave the nuts loose at first for easy adjusting.
- Cut posts to size, put them in the bases, and secure with hardware nails or screws.
- Level everything out using a string line, and if needed, fine-tune with shims (avoid wood shims as they can compress over time).
- If building a low deck, you may use pre-formed concrete blocks instead of poured footings, but be careful to level these well.
4. Attach Ledgers and Beams
- If the deck is attached to your house, remove the siding above where the ledger (main board attached to the house) will go, and apply waterproof membrane over the sheathing.
- Mark the top edge for the ledger and line up treated wood spacers every 2 feet, then attach the ledger with large lag screws, through pilot holes, into the house structure.
- Apply waterproof flashing over the ledger.
- For freestanding decks, set up support beams on posts instead of using a ledger.
5. Frame the Deck
- Attach rim joists to the posts forming your deck’s outline, and double-check they’re level.
- Cut posts flush with the tops of rim joists as needed.
- Mark and install joists (usually 12, 16, or 24 inches apart) either between rim joists or on beams. Use joist hangers for extra support.
- Always put the “crown” of each joist (slight upward curve) facing up.
- Apply flashing tape on the tops for moisture protection, and add blocking between joists to prevent side movement and reduce bounce.

6. Lay Deck Boards
- Start with a board against the house (or opposite side if it works better), keeping the ends long at first. Secure with two screws into each joist, about an inch from the edge.
- Use spacers (1/8-3/16 inch for wood) to keep gaps between boards for drainage.
- Check that boards stay straight and parallel as you go. Mix board types for a neat pattern and stagger seams for strength.
- When all boards are down, mark final ends with chalk line and cut off any extra to get a smooth edge.
7. Add Railings and Stairs
- If your deck is higher than 30 inches or local rules require, install railings for safety. Put posts at corners and at regular intervals, securing them tightly to the deck frame.
- Add top and bottom rails, then put in balusters. Make sure the spaces between are less than 4 inches wide.
- If you need stairs, figure out the right step height and depth for comfort and safety, cut stringers, attach treads and risers, and firmly secure the steps and landings.
8. Deck Drainage and Slope
- To keep your deck from rotting, make sure water can drain off. Build in a small slope: about 1/4 inch for each foot of deck, sloping away from the house.
- Use flashing tape on joists and consider gravel under the deck to move water away. Good airflow below the deck helps wood dry out and last longer.
Customizing Your Deck
Once the basic deck is done, you can personalize it to match your needs or taste.
Multi-Level and Curved Decks
Multi-level decks can create separate areas, like dining or lounge spots, and are great for sloped yards. Curved decks look unusual and natural but need more skill and careful planning. Both options add interest but take extra work and checking to make sure the frame can handle the new shapes or heights.
Extra Features
- Hot tubs: Make sure your deck structure can handle the heavy weight. Only install hot tubs on decks designed for it.
- Planters: Blend planters into rails or corners for flowers or shrubs.
- Lighting: Recessed lights, post caps, or string lights make evenings nicer but usually need a transformer and sometimes extra wiring.
- Seating/storage: Add benches or storage boxes for convenience and neatness.
- Overhead shade: Consider a pergola or simple canopy for shade and style.
Extensions and Upgrades
If your old deck is still strong but feels too small or dull, you can expand it, add new features, or switch materials for a fresh look. Make sure any additions meet building codes and are safely built onto the old frame.
How to Maintain Your Deck
Keeping your deck in good shape helps it last longer and stay safe. Ignoring needed cleaning or repairs can lead to expensive damage. Think of upkeep as regular care-small repairs now prevent bigger problems down the line.
Protecting the Structure
Moisture is the main enemy of decks, especially the joists and beams. Use flashing tape to cover the tops and keep rain out. Gravel underneath and good ventilation help reduce dampness. Check for wood rot, insect damage, and softness regularly, and repair it right away.
Finishing and Sealing
- Let new pressure-treated wood dry for several weeks or months before painting or staining. Wood is ready if water absorbs in under a minute (not beads up).
- Use exterior stains or sealers to protect from sun, water, and wear. Composite boards usually only need cleaning, not sealing.
- After staining or sealing, let the deck dry 24-48 hours before use.
Fixing Common Issues
Decks sometimes get bouncy, or beams and posts stop supporting properly. Shim joists or reinforce beams as needed. Make sure connections with bolts or special screws are strong and not wobbly. If you notice rotten or damaged boards, change them right away. Always use the hardware type specified for joist hangers and key connectors.
Regular Checks
- Each year, check for loose fasteners, split or rotten wood, and wobbly railings or stairs.
- Clean off leaves and debris and use deck cleaner if needed.
- Reapply sealers or stain every 1-3 years (check product label for details).
- Keep up with small repairs to avoid bigger issues later.
How Much Will It Cost and How Long Will It Take?
Knowing how much money and time your deck will need helps keep your project realistic and on budget. The numbers depend on size, materials, design, and whether you do it yourself or hire help.
Cost Breakdown
| Deck Type/Size | Materials (DIY) | Extra for Professional Labor |
|---|---|---|
| 10×16 ft Pressure-Treated | $800-$1,000 | Varies by region/project |
| Cedar/Redwood/Composite | Higher than wood | Varies |
Pressure-treated wood is the cheapest, and composite or premium woods cost more. Labor is often the biggest extra cost if you hire a contractor. Always ask how they’ll handle possible extra charges, and choose fixed quotes if possible.
Time Needed
- A simple DIY deck can take 4-6 days of hands-on work (plus time for concrete to cure).
- More complex decks, bigger projects, or hard yard prep can take much longer.
- Work goes faster with a helper. Weather, material hassles, or problems can slow things down, so build in some extra time.
Ways to Save
- Do as much of the work yourself as you can.
- Use pressure-treated wood for most of the framing and decking.
- Buy only what you need-carefully estimate materials.
- Stick to a simple shape to avoid costly extras.
- Try concrete deck blocks for ground-level decks to save time and money.
- Take care of your deck to avoid costly repairs later.
Common Questions About Building Decks
Here are answers to some typical questions you might have as you design and build your deck.
How do I build a deck on a slope?
Building on uneven ground means you need a level top, even if your posts or footings end up different lengths. You can dig out high spots and fill low ones, or use longer posts on the downhill side. Sometimes, a multi-level deck that steps down with the land is easier and looks better. Always check the foundation is solid and the top frame is level, whatever the slope.
Which material is best for decking?
- Pressure-treated wood: Affordable, can be stained any color, requires regular sealing/staining.
- Composite/PVC: Low-maintenance, long-lasting, resists rot and bugs, initial cost is higher.
- Cedar/Redwood: Naturally pretty, resists pests and rot, but costs more.
Choose what fits your budget, look, and how much maintenance you want to do.
How do I build around obstacles like trees or AC units?
- Leave space around trees for future growth and to keep roots healthy. Build planters or “wells” around the trunk and try not to dig footings too close.
- For AC units, make sure air can flow on all sides and above. Leave enough room for maintenance-use removable decking or leave a gap so the unit is easy to reach.
Is a freestanding or “floating” deck safe?
Freestanding decks are supported by posts and footings, not attached to your house. These are safe and sometimes necessary if your house can’t support a ledger board. Floating decks (very low ones) often sit on concrete blocks. These are fine for short decks but need “ground contact” rated lumber and should always be built strong and level. Always check local codes, even for low decks.


![What to with Scrap Metal? [infographic]?](https://facts-homes.com/wp-content/uploads/2019/07/645413-POPYOV-391-120x86.jpg)


