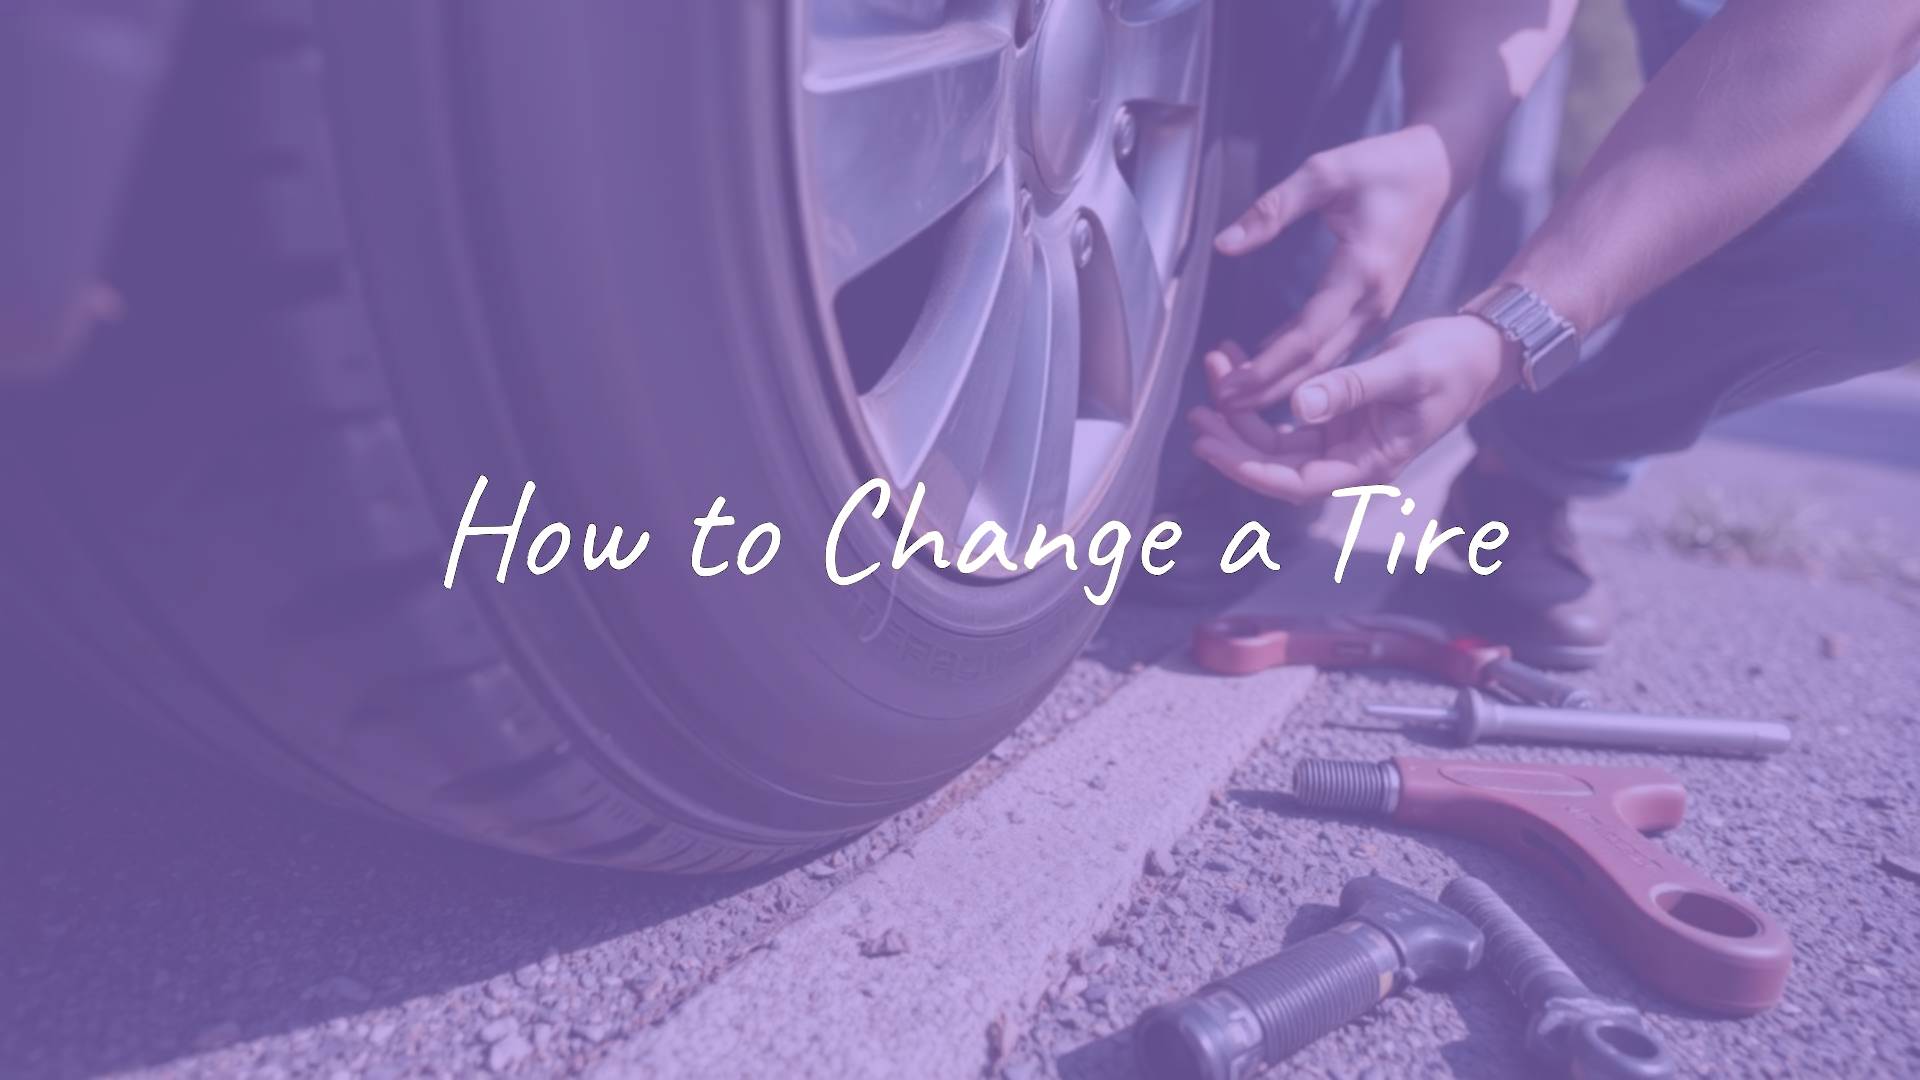
Getting a flat tire can disrupt your day, whether you run over a nail or hit a curb. It can quickly turn from a small hassle to a stressful problem, especially on the side of the road. The good news is that changing a tire is something most people can do with a little knowledge. This guide will explain everything you need, from the necessary tools to step-by-step directions, so you can safely get moving again.

What Tools and Equipment Do You Need?
Before starting, make sure you have all the right tools. Most cars come with the basics, but it’s smart to check your trunk now and then to see that nothing is missing or broken. The right equipment makes the job easier and helps keep you safe.

Your car’s trunk should act as a small emergency kit. The tire-changing tools should have come with your car, but they can get lost or wear out. Doing a quick check now can help you avoid problems if you get a flat in the future.
| Tool | Purpose |
|---|---|
| Spare Tire | Replaces the flat tire so you can drive to a repair shop |
| Jack | Raises your vehicle off the ground |
| Lug Wrench | Loosens and tightens the lug nuts |
| Wheel Wedges/Chocks | Stops the car from rolling |
| Flashlight & Reflective Gear | Helps you see and stay visible at night |
| Tire Pressure Gauge | Checks air pressure in the spare |
Spare Tire
You need a spare tire. Most cars today have a “donut” or compact spare, which is smaller and only for short trips to a repair shop. Check your car manual for advice on how fast and how far you can drive on your spare. Make sure it has enough air by checking it every so often. A spare with no air will not help you.
Jack
A jack lifts your car so you can take off the flat tire and put on the spare. Your manual shows where to place the jack safely. The wrong spot can damage your car or cause injury. Never put your body under the car when it’s only held up by the jack.
Lug Wrench
This tool removes the nuts that hold your wheel in place. Most vehicles have an L-shaped lug wrench, but tight or rusted-on lug nuts might need a longer one or a torque wrench. If your car has a locking nut, you’ll need a special key, usually in the glove box or near the spare. Know where that is.
Wheel Wedges/Chocks
Wheel wedges or chocks stop your car from moving while you work. Put them on the opposite side of the flat. For example, use them behind the rear wheels when changing a front tire. If you don’t have wedges, bricks or big rocks can be used if needed.
Flashlight and Reflective Gear
These keep you safe after dark or in bad visibility. Use a flashlight with fresh batteries to see, and wear a reflective vest or set up reflective triangles about 100 feet behind your car to warn others.
Tire Pressure Gauge
You need a tire gauge to check your spare’s pressure before and after putting it on. This helps you avoid driving on a poorly inflated tire. If it’s low, drive slowly to the nearest gas station to add air.
Other Helpful Items
- A piece of 2×6-inch wood – place under the jack for a stable base, especially on soft ground.
- Gloves – protect your hands.
- Rain poncho – stay dry in wet weather.
- Your owner’s manual – has car-specific information.
When Is It Better Not to Change a Tire Yourself?
While changing a tire is a valuable skill, there are times when it is safer to call a professional. Your safety comes first. Trying to change a tire in risky conditions can put you and others in harm’s way.
Be honest about your abilities and the situation. Do not try to change a tire if you feel unsafe or uncomfortable. Roadside help is there for these reasons, handling millions of flat tire calls every year.

| Situation | Why to Call for Help |
|---|---|
| Poor Weather or Darkness | Visibility is low and cars may not see you. Slippery surfaces make the job harder and less safe. |
| Unsafe Place | Changing a tire on a highway, narrow shoulder, or curve can be very dangerous due to passing traffic. |
| No Proper Equipment | Missing or broken tools make changing the tire too risky or impossible. |
| Physical Limits | Health issues or injuries could get worse if you do the work yourself. |
Poor Visibility or Bad Weather
Bad weather like rain, snow, fog, or even extreme heat makes changing a tire tough and unsafe. Low visibility means drivers might not see you. Wet or icy roads make jacks less steady. If the weather is dangerous, it is better to call for help.
Dangerous Locations
Don’t attempt a tire change on a busy road, a narrow space, or anywhere near fast traffic. If you have to, drive slowly to a quieter spot-even if it means damaging the tire more. Safety is more important than the tire or rim.
If you can’t get out of the car safely, don’t risk it. Stay inside with hazard lights on and call for help.
Lack of Tools or Damaged Equipment
If you find your spare is flat, the jack is missing, or you can’t loosen the lug nuts, stop. Trying to make do without the right tools can be dangerous and frustrating.
Some newer cars only have tire repair kits instead of spare tires. These kits are for small leaks, not large holes or sidewall damage. If the flat is too bad for a kit, you need professional help.
Physical Difficulty or Injury
Changing a tire means kneeling, lifting, and pushing-if you have any injury, medical condition, or don’t feel well, call for help. The risk of hurting yourself is not worth it.
If you have children or others who need care with you, getting everyone away from traffic should come first.
When to Call Roadside Help
Often, calling roadside assistance is the right move-especially in hard or dangerous conditions. Companies like AAA help with flat tires every day. Most new vehicles also include a service number. Keep it handy so you can call when needed.
Don’t hesitate to call if you’re unsure. A professional can get the job done fast and safely.
Steps to Change a Tire
If you have everything you need and are in a safe place, follow these steps. Take your time and work carefully rather than rushing.

- Find a Safe Spot
When you realize you have a flat, slow down and look for a safe, level area to pull over-away from traffic and not on soft soil or hills. Store parking lots or wide breakdown lanes work well. If you need to, drive slowly to a safer spot rather than stop in traffic. - Turn on Hazard Lights and Secure the Car
Switch on your hazard lights as soon as you stop. This helps drivers see your car. Set your car in park (or in gear if you have a manual) and use the parking brake. Place wheel chocks or blocks on the side opposite the flat. This keeps the car from rolling. - Get Your Tools Ready
Take out the spare tire, jack, and lug wrench from your trunk or storage area. Some vehicles have the spare under the car. Lay out your tools close to the flat. - Remove Wheel Cover or Hubcap
If a cover hides the lug nuts, take it off first. Your manual will show how. If the nuts are already exposed, skip this step. - Loosen the Lug Nuts
Use the lug wrench to loosen the lug nuts while the tire is still on the ground by turning them left (counterclockwise). They may be very tight; you might need to use your foot or lean on the wrench. Loosen each one by about a quarter or half turn, but don’t remove them all the way yet. - Raise the Car
Check your manual for the jack points-usually behind the front wheels or in front of the rear wheels. Put the jack in place, and if you have a wood block, use it underneath for a solid base. Lift the car until the flat tire is a few inches off the ground.

- Remove the Flat Tire
Now finish taking off the lug nuts and keep them in a safe spot. Pull the flat straight toward you until it comes off, then set it aside away from traffic. - Put on the Spare Tire
Line up the holes of the spare with the bolts and push the tire on tightly. Put the lug nuts back on by hand, turning them right (clockwise) until snug. - Tighten Lug Nuts
Lower the car so the tire just touches the ground. Tighten the nuts with your wrench in a crisscross (star) pattern. This keeps the tire straight. Don’t fully tighten yet. - Lower the Car and Fully Tighten Nuts
Bring the car completely down and remove the jack. Now, fully tighten the lug nuts, again using the star pattern. Push as hard as you can. - Check Tire Pressure and Put Away Tools
Use the tire gauge to make sure the spare has enough air. If it’s low, drive slowly to a place where you can fill it up. Gather all your tools, the flat tire, and safety equipment before you leave.
What to Do After You’ve Changed the Tire
Changing the tire solves your immediate problem, but you’re not finished. Spare tires, especially smaller “donuts,” are only meant to get you to the nearest repair shop. Using a spare for too long can cause damage or even another flat tire.
- Check the Spare’s Air Pressure
Even if you checked it before, check again soon after starting to drive. If the air is low, add more as soon as you can, or go straight to a gas station. - Drive Slowly and Keep to Suggested Speeds
Spare tires usually aren’t meant for speeds higher than 50-55 mph or for more than about 50 miles. Read your car manual or look for a sticker in the driver’s door for exact numbers. Driving too fast or too far can make the spare unsafe. - Fix or Replace Your Damaged Tire
Go to a mechanic or tire shop as soon as possible. Sometimes you can repair your flat tire, but big punctures or damage to the side of the tire means you’ll need to buy a new one. Using a spare for too long can cause more problems and cost more money.


![What to with Scrap Metal? [infographic]?](https://facts-homes.com/wp-content/uploads/2019/07/645413-POPYOV-391-120x86.jpg)


